Fast, smart and easy to use selection based textures packing, repacking and generation tool. Editor tool, no need to drop into scene.
快速,智能和易于使用的选择基于纹理包装,重新包装和生成工具. 编辑器工具,无需投入场景。
Technical Details:
Number of Blueprints: 1
Materials: 1
Material Functions: 13
Platforms: All because it’s editor tool and not meant to be used in runtime
Virtual Textures: Not supported directly (please read about it in IMPORTANT above)
Documentation: Link Or can be accessed from Packer window
技术细节:
蓝图数目:1
材料:1
材料功能:13
平台:所有这些都是因为它是编辑器工具,而不是在运行时使用
虚拟纹理:不直接支持(请阅读上面的重要内容)
文件: 连结 或者可以从Packer窗口访问
Showcase Video: Link
Tutorial Video: Link
Extra tutorial how to use packed textures and Normal map combine: Link
Update 1.1 – More naming options. Can use name of the first selected texture (useful for repacking same texture) with option to replace something in it. For example If original texture is RMA (Roughness + Metallic + AO) and you want to repack it to ARM.
If use reuse original texture name it won’t be overwritten, but instead will get suffix _old.
Update 1.2 – Added option to use first selected texture size (CAUTION – original texture must be power of two or it won’t pack. For example 512×1024 or 256×2048 are valid sizes even if not square).
It has been noticed that sometimes packer doesn’t produce 1:1 contrast. This is happening if original texture is really sRGB or not. Now packer will check that and adjust material. So if your packed texture won’t be 1:1 quality just enable/disable sRGB tick and it should fix issue.
Currently you can use Rapid Packer to:
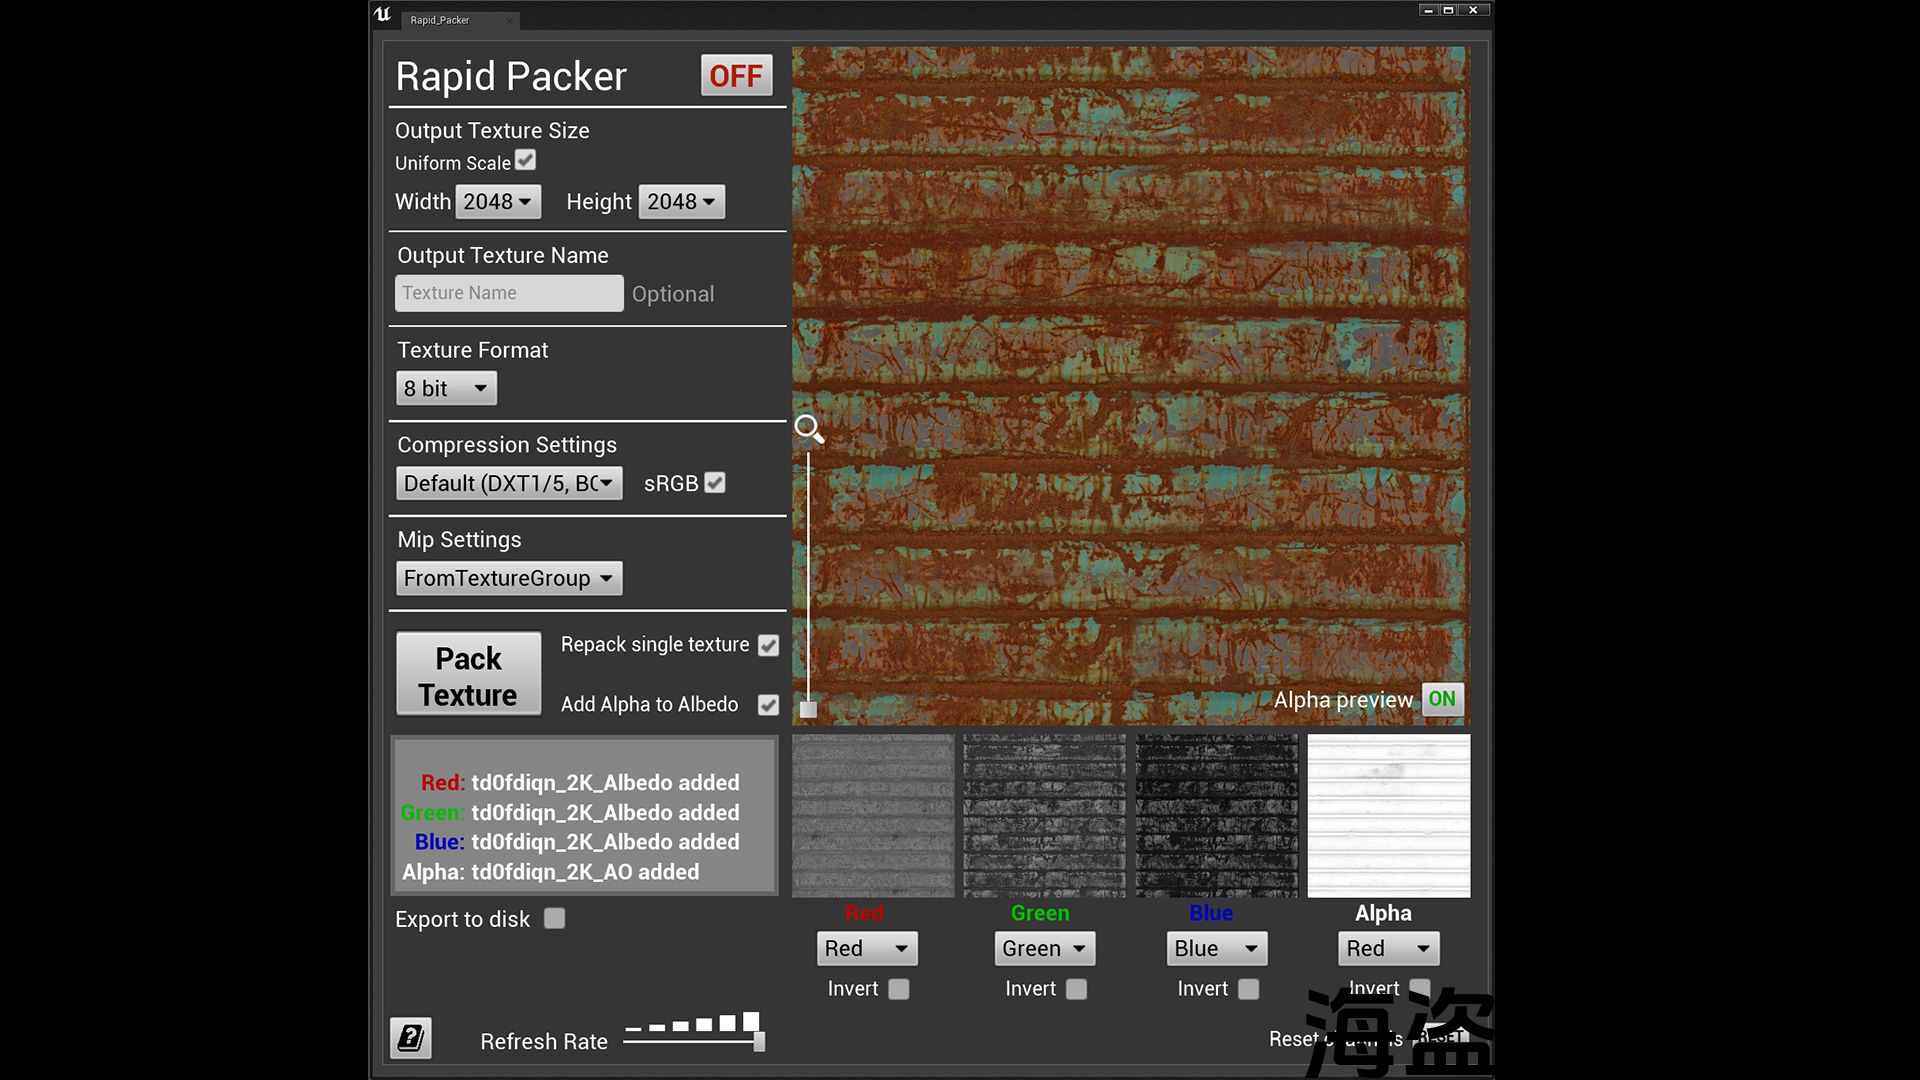
- Pack textures into RGBA (or single channel etc.)
- Repack single texture (swap channels information)
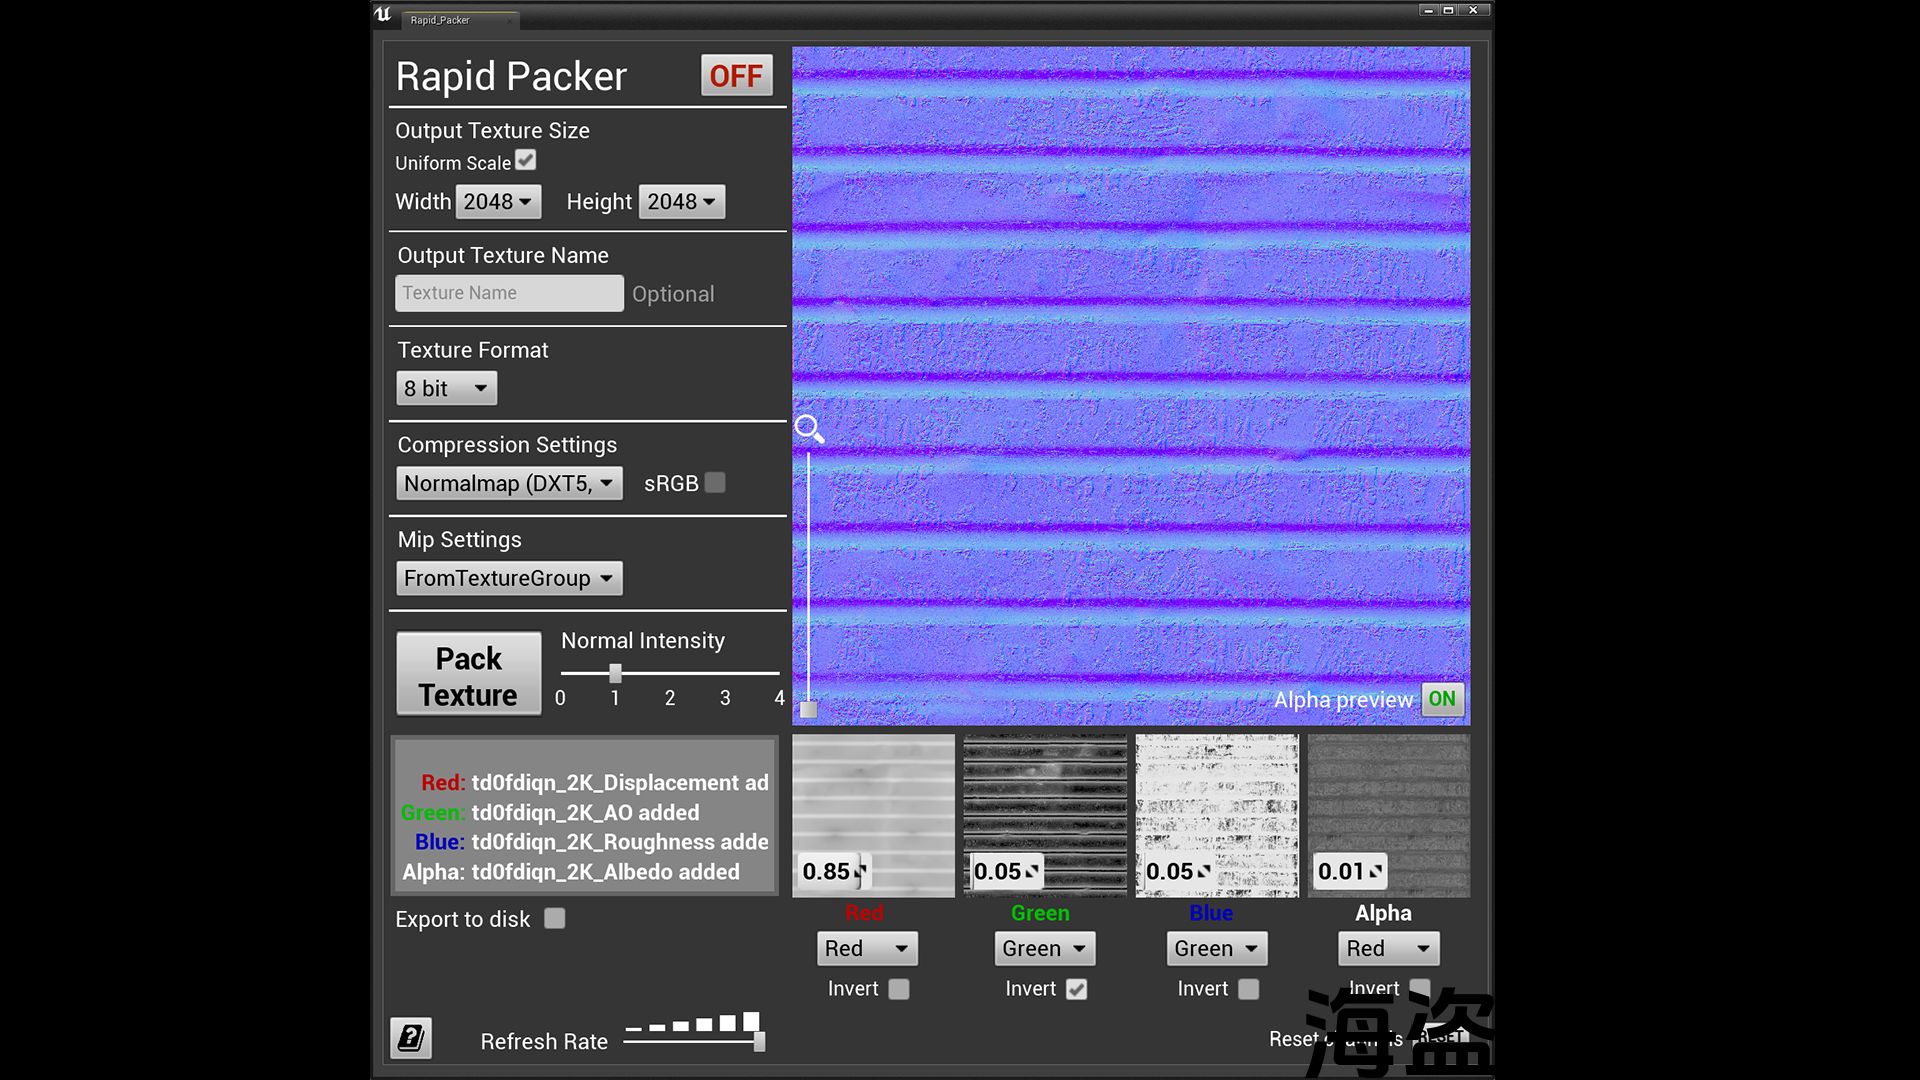
- Generate Normal map based on up to 4 source inputs
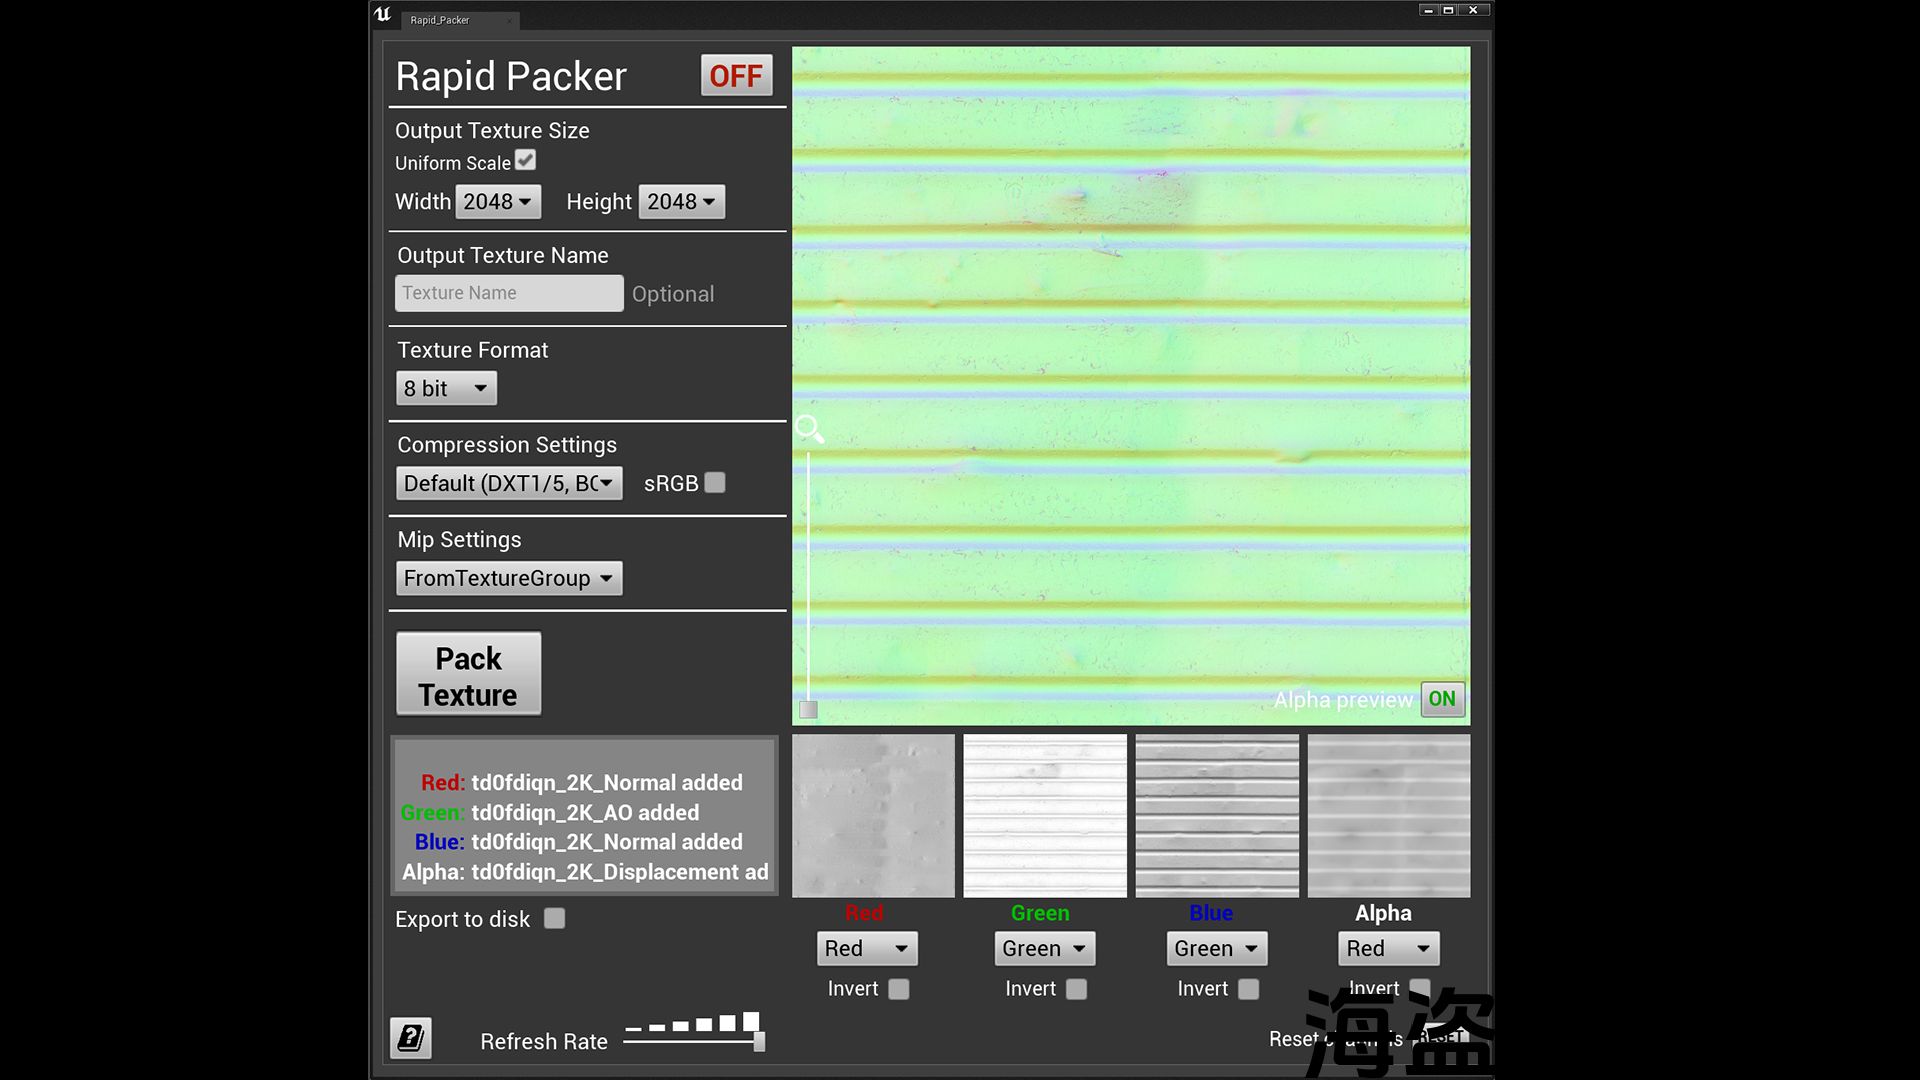
- Combine Normal map with extra textures
- Add Alpha to the Albedo
- Export PNG texture to the local disk
- Invert channels
Tool works as an editor utility, which means you don’t need to drop anything to the scene to start using it.
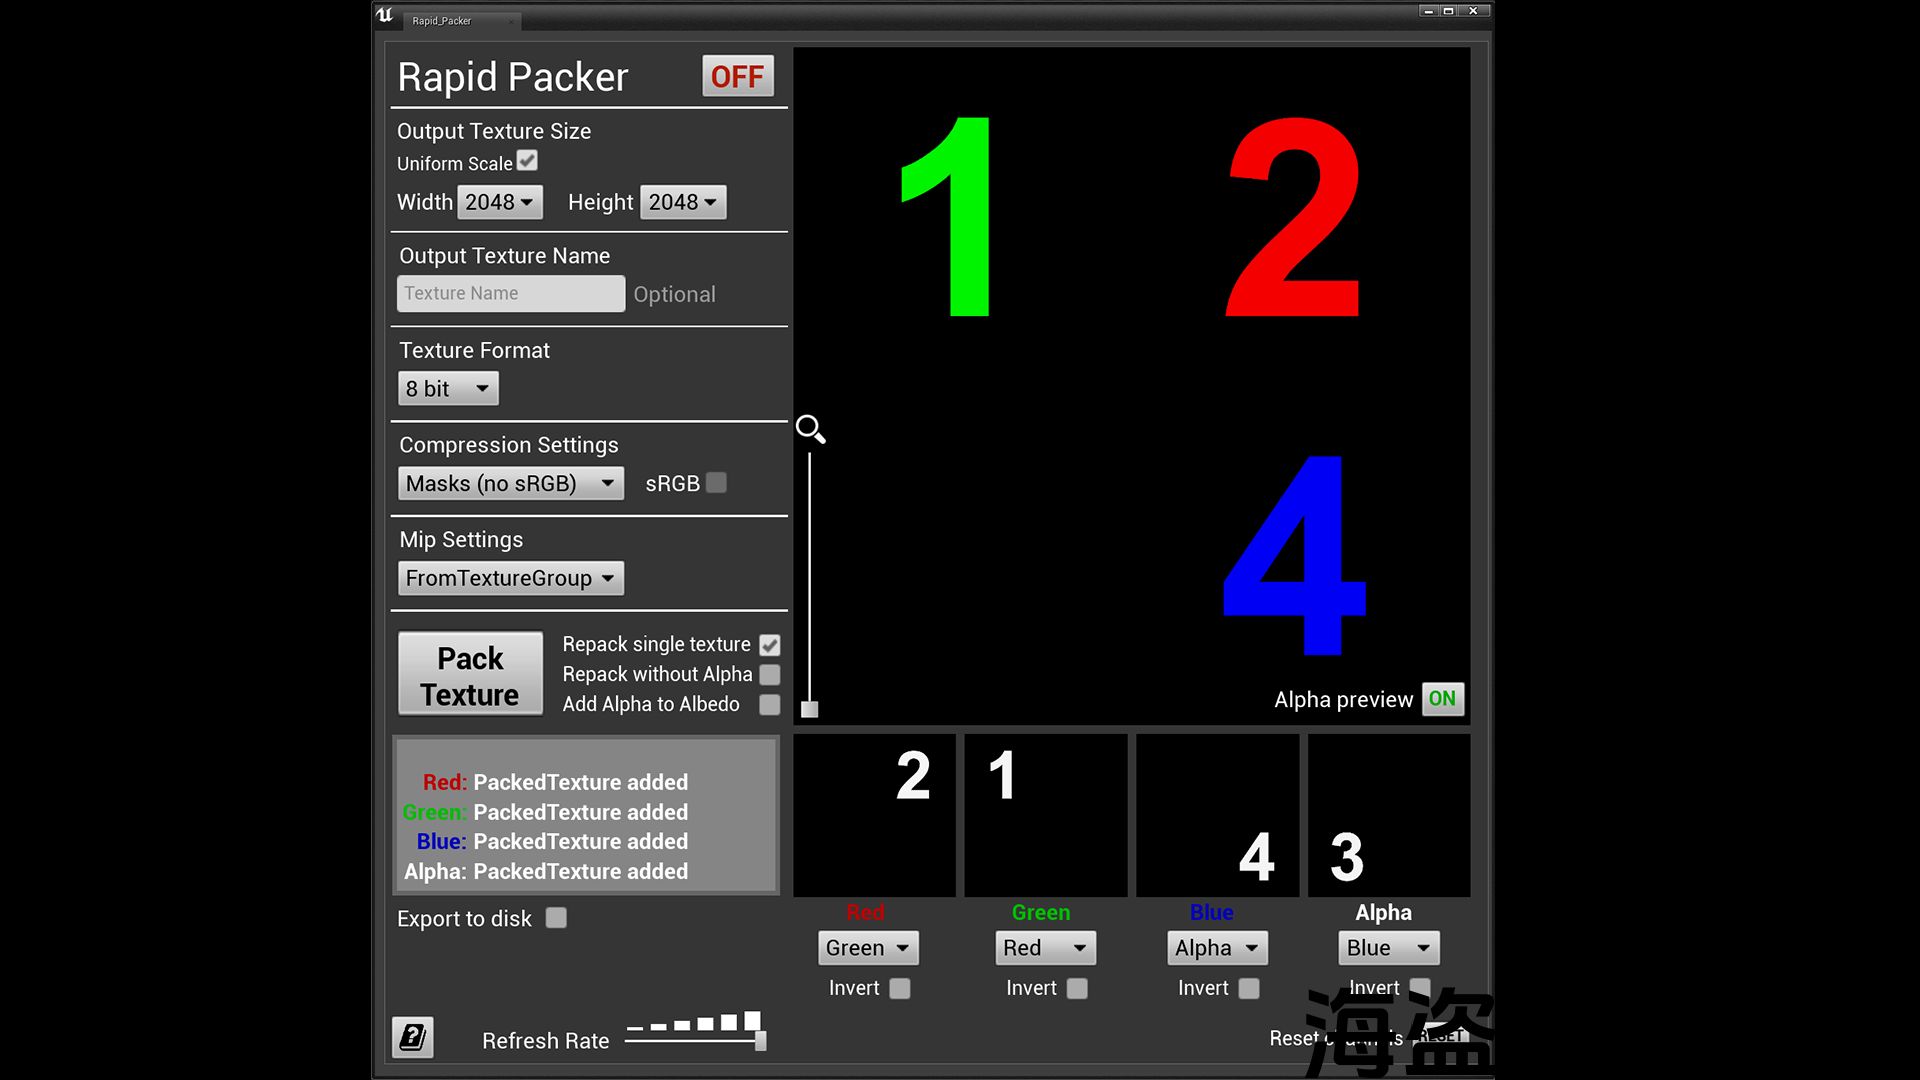
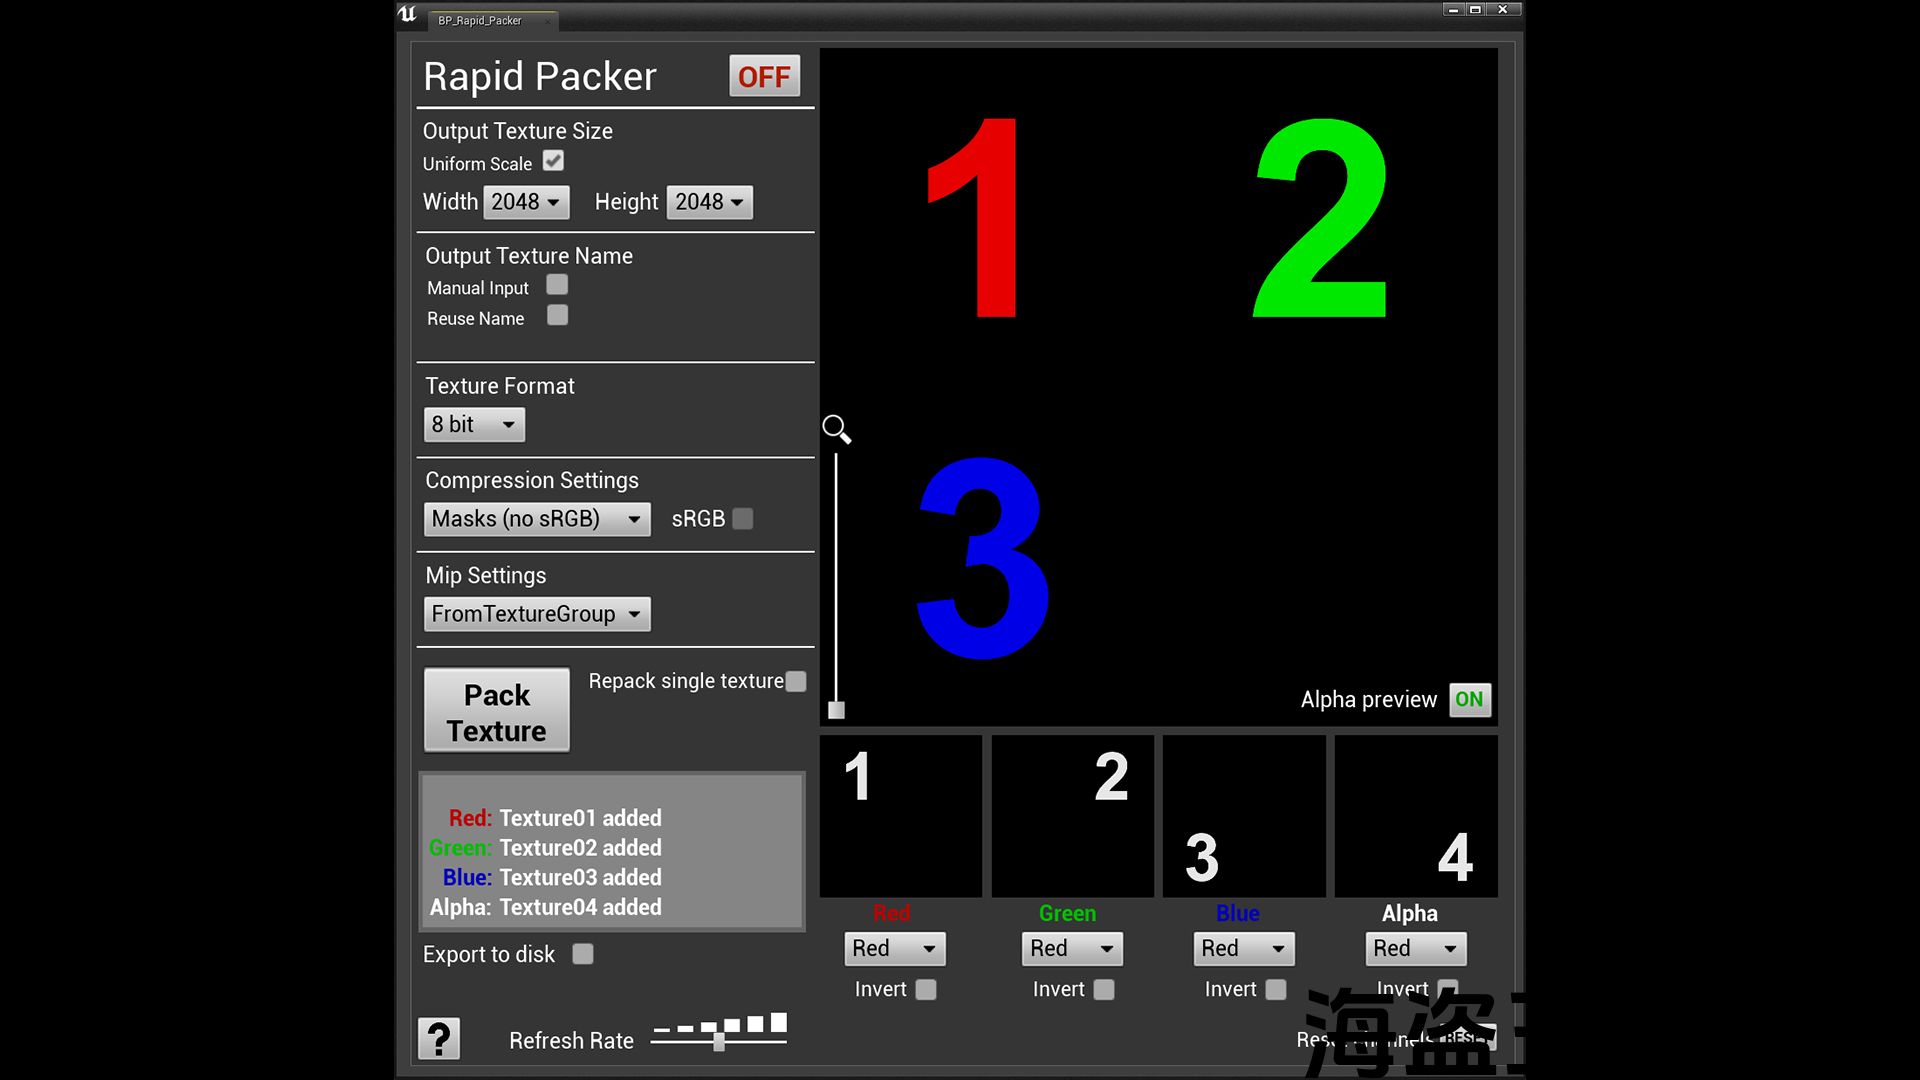
No need to drag and drop anything or import, selected textures in Content Browser added automatically to the channels based on selection order (1+2+3+4 = 1R+2G+3B+4A).
Different options and buttons appear based on selected mode, so no need to worry about what to click when (less confusion, faster work).
Automatic output to the same folder where textures were selected to speed up the process.
Simple information window showing which selected texture assigned to which channel.
Large preview window showing what the final result would look like and 4 small windows for each channel, working as grayscale.
Update:
Added options to manually name packed texture or use the name of the first selected texture. If name is reused then old texture will have added _old. Additionally there is now option to replace part of the text, which is useful when repacking single texture, for example PackedMRA into PackedARM. More info with images in the manual.
IMPORTANT:
Unfortunately virtual textures (when on the texture thumbnail you can see VT) are not directly compatible with Rapid Packer.
Packet texture will be low quality. I tried different ways to detect when the texture is VT and automatically use a different input sampler. In some cases that worked, but it wasn’t 100% all the time. On top of that quality of VT textures sampling is affected by another parameter in the Project Setting > Rendering > Virtual Textures called “Tile Size”. For instance if your original texture is 2k and in Tile Size set to 256, output will be unfortunately of low quality.
Simple solution for a workaround would be to convert the texture into regular texture and after packing convert back to VT. Yes, it isn’t so fast then, especially with many textures, but for now it’s the only way to make sure output is 100% of the time highest quality possible.
To quickly convert a VT texture into a regular one right click on it and choose “Convert to Regular Texture”. After you are done you can again right click on it and choose “Convert to Virtual Texture”.
Make sure to turn on in Plugins: Editor Scripting Utilities
I have tested this tool many times, but if you encounter any issues or glitches please send me an email (or contact in any other way) and I will fix it ASAP.
If you have any suggestions or requests please don’t hesitate to contact me and I will check them.
展览短片: 连结
教程视频: 连结
额外教程如何使用包装纹理和法线贴图组合: 连结
更新1.1 -更多命名选项。 可以使用第一个选定纹理的名称(用于重新包装相同的纹理)与选项来替换它的东西。 例如,如果原始纹理是RMA(粗糙度+金属+AO),并且您想将其重新包装到ARM。
如果使用原始纹理名称,它不会被复盖,而是会得到后缀_old。
更新1.2 -增加了使用第一个选择的纹理大小的选项(注意-原始纹理必须是两次方,否则它不会打包。 例如512×1024或256×2048是有效的大小,即使不是正方形)。
已经注意到,有时packer不会产生1:1的对比度。 如果原始纹理真的是sRGB,就会发生这种情况。 现在封隔器将检查并调整材料。 因此,如果您的包装纹理不会是1:1的质量,只需启用/禁用sRGB蜱,它应该解决问题。
目前您可以使用快速封隔器来:
- 将纹理打包到RGBA(或单通道等)中。)
- 重新打包单个纹理(交换通道信息)
- 根据多达4个源输入生成法线贴图
- 将法线贴图与额外纹理相结合
- 将Alpha添加到反照率
- 将PNG纹理导出到本地磁盘
- 反转通道
工具作为一个编辑器工具,这意味着您不需要将任何东西放到场景中就可以开始使用它。
不需要拖放任何东西或导入,在内容浏览器中选择的纹理根据选择顺序自动添加到通道(1+2+3+4 =1R+2G+3B+4A)。
不同的选项和按钮根据所选模式出现,因此无需担心何时点击什么(更少的混乱,更快的工作)。
自动输出到选择纹理的同一文件夹,以加快进程。
简单的信息窗口显示哪个选择的纹理分配给哪个通道.
显示最终结果的大预览窗口和每个通道的4个小窗口,作为灰度工作。
更新资料:
添加了手动命名填充纹理或使用第一个选定纹理的名称的选项。 如果名称被重用,那么旧纹理将添加_old。 此外,现在还有替换部分文本的选项,这在重新打包单个纹理时很有用,例如PackedMRA到PackedARM中。 更多信息与图片在手册.
重要事项:
不幸的是,虚拟纹理(当在纹理缩略图上你可以看到VT)与快速包装器不直接兼容。
分组纹理将是低质量的。 我尝试了不同的方法来检测纹理何时为VT,并自动使用不同的输入采样器。 在某些情况下,工作,但它不是100%所有的时间。 除此之外,VT纹理采样的质量还受到项目设置>渲染>虚拟纹理中称为”瓷砖大小”的另一个参数的影响。 例如,如果您的原始纹理是2k,并且瓷砖大小设置为256,输出将不幸的是质量低。
解决方法的简单解决方案是将纹理转换为常规纹理,并在打包后转换回VT。 是的,它不是那么快,特别是有很多纹理,但现在它是唯一的方法,以确保输出是100%的时间最高质量可能。
要快速将VT纹理转换为常规纹理,请右键单击它并选择”转换为常规纹理”。 完成后,您可以再次右键单击它并选择”转换为虚拟纹理”。
确保在插件中打开: 编辑器脚本实用程序
我已经多次测试过这个工具,但如果您遇到任何问题或故障,请给我发送电子邮件(或以任何其他方式联系),我会尽快修复它。
如果您有任何建议或要求,请不要犹豫与我联系,我会检查他们。
评论(0)